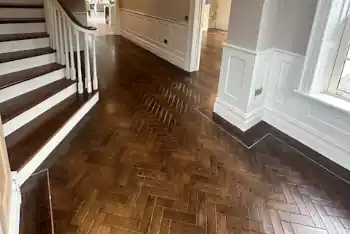
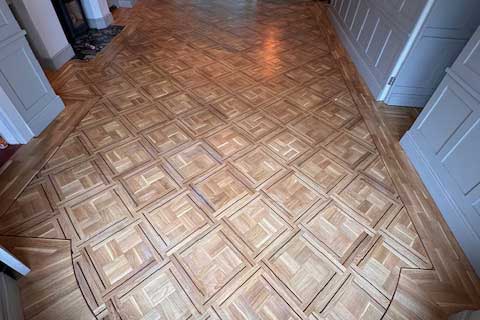
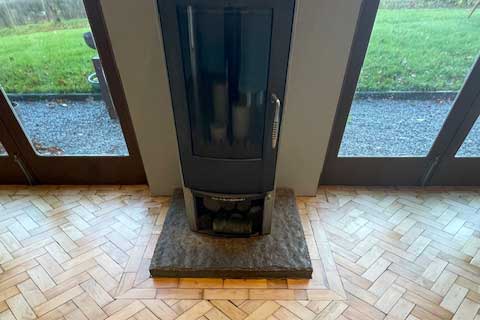
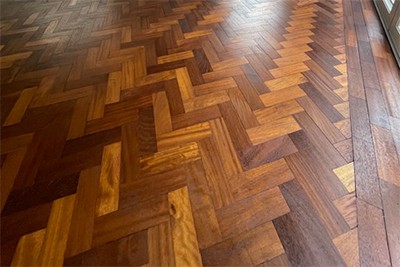
MM Parquet and Carpentry took on this large project on the outskirts of Naas, Co Kildare . As we have taken on many previous projects in this stunning county , we were only too happy to do this project as it was for a building contractor that we have done many projects for in the past. This project was a very large one as we supplied and fitted over 220m2 through out this complete bungalow
We began by preparing the subfloor, ensuring it was clean, level, and free from any debris. This step is crucial for achieving a smooth and long-lasting installation and takes time as we had to do a lot of grinding and buffing of subfloors to remove a lot of the damaged subfloors
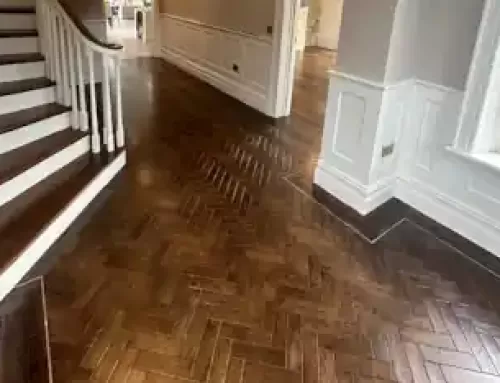
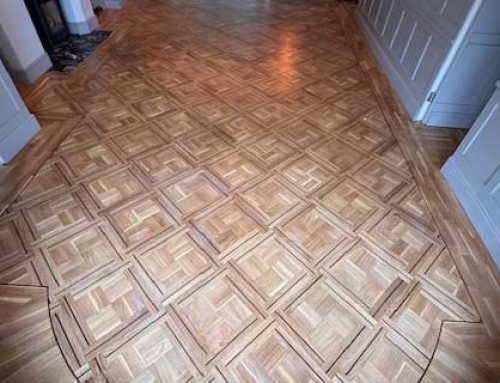
Next, we discussed with the client layouts of the different rooms , then we laid out the parquet flooring in a herringbone pattern to determine the best starting point. We made sure to consider the room’s layout, natural light sources, and any focal points to create a visually appealing design. All these small steps are so important when it comes to parquet flooring design
Once the starting point was established, we began applying an appropriate adhesive to the subfloor using a trowel. It’s essential to choose an adhesive specifically designed for solid wood flooring to ensure a strong bond. Also, this is critical when it comes to your air to water heating systems as you need the strongest of bonds when it comes to a glued down system.
Once the starting point was established, we began applying an appropriate adhesive to the subfloor using a trowel. It’s essential to choose an adhesive specifically designed for solid wood flooring to ensure a strong bond. Also, this is critical when it comes to your air to water heating systems as you need the strongest of bonds when it comes to a glued down system.
We carefully laid each individual piece of the parquet flooring, making sure they fit tightly together without any gaps. This required precision and attention to detail to achieve a seamless look. As we progressed, we used a rubber mallet to gently tap the flooring into place, ensuring it was firmly secured to the adhesive. This step helped to eliminate any unevenness or gaps between the pieces. As the parquet flooring is halfway through the fitting process, MM Parquet and carpentry always install a Bluetooth monitoring chip. We are the only flooring company in Ireland to install such systems for your floors, as this will help to set your floor temperature at floor level and give you the correct temperature to live comfortably and not end up with excessive electricity bills with the current climate.
After the entire floor was installed, we allowed the adhesive to dry completely before proceeding to the next step. This drying time varies depending on the adhesive used, so it’s essential to follow the manufacturer’s instructions.
Once the adhesive was dry, we sanded the entire floor to create a smooth and even surface. This step is crucial for achieving a professional finish and removing any imperfections.
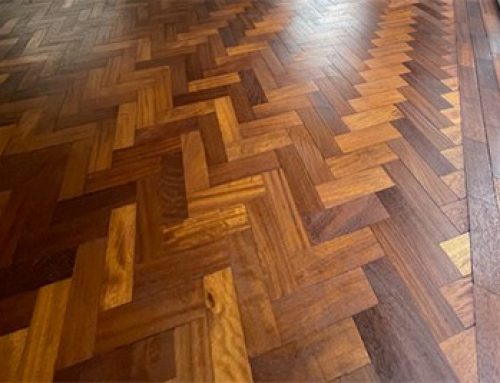
After sanding, we applied a protective finish to the parquet flooring. At MM Parquet and carpentry, we have now moved all our flooring lacquer and wax oil finishes to the word class Bona products . All these Bona products are not just the best for ware on your floors, but have the best maintenance product to back everything up.
After sanding, we applied a protective finish to the parquet flooring. At MM Parquet and carpentry, we have now moved all our flooring lacquer and wax oil finishes to the word class Bona products . All these Bona products are not just the best for ware on your floors, but have the best maintenance product to back everything up.
This finish helps to enhance the wood’s natural beauty, protect it from wear and tear, and make it easier to clean and maintain.
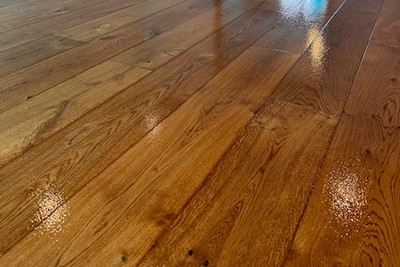
The client had made the decision to finished with the Bona White tone, which you can see looks stunning from the photos ,
We began by ensuring that the parquet flooring was clean and free from any dust
We applied a thin and even layer of the chosen Bona raw tone finish to the parquet flooring using a Light pill roller. It’s important to work in small sections to ensure that the finish is applied uniformly.
After applying the Bona raw tone finish, we allowed it to dry according to the manufacturer’s instructions. This drying time can vary, so it’s essential to follow the recommended guidelines.
Once the Bona raw tone finish was dry, we lightly sanded the surface of the parquet flooring using fine-grit sandpaper. This step helps to smooth out any imperfections and prepares the surface for the next lacquer application.
Once the Bona raw tone finish was dry, we lightly sanded the surface of the parquet flooring using fine-grit sandpaper. This step helps to smooth out any imperfections and prepares the surface for the next lacquer application.
We then applied a matte lacquer over the Bona white tone . The matte lacquer enhances the natural beauty of the wood while providing a protective layer against wear and tear. After each coat of matte lacquer, we allowed it to dry completely before applying the next coat. This drying time is essential for achieving a durable and long-lasting finish, which in some cases we can apply up to 4-5 coats depending on traffic.
Depending on the desired level of sheen and durability, we applied multiple coats of matte lacquer. Each additional coat adds depth and protection to the parquet flooring.
Finally, we applied the final coat of matte lacquer, ensuring that it was applied evenly and smoothly. After allowing it to dry completely, we inspected the finished flooring to ensure that it met our high standards of quality and craftsmanship.
By following these steps, we were able to achieve a stunning Bona white finish with a matte lacquer on the solid herringbone parquet flooring, providing our client with a beautiful and durable surface that will last for years to come. MM Parquet and carpentry had the pleasure of finishing another stunning parquet flooring in greater Leinster area of Co Kildare
MM Parquet & Carpentry Ltd
Call Us Now 0860745860 / 0599158836
Call Us Now 0860745860 / 0599158836


